The fastest way to ruin your first VR session is to rush setup. The second fastest way is to jump in while your room and fit aren’t ready.
With the right VR headset setup, you get smooth tracking, clear visuals, and fewer “wait, what was that?” moments. In March 2026, many people are starting with a budget-friendly Meta Quest 3S, stepping up to Meta Quest 3, or choosing premium mixed reality like Apple Vision Pro. If you’re on console, PSVR 2 is a common pick for PS5 owners.
This guide walks through the process step by step, for both standalone and tethered headsets. Plan for 30 to 60 minutes, use a clear space, and test short sessions first if you’re new.
Pick the Perfect Spot and Unbox Your Gear
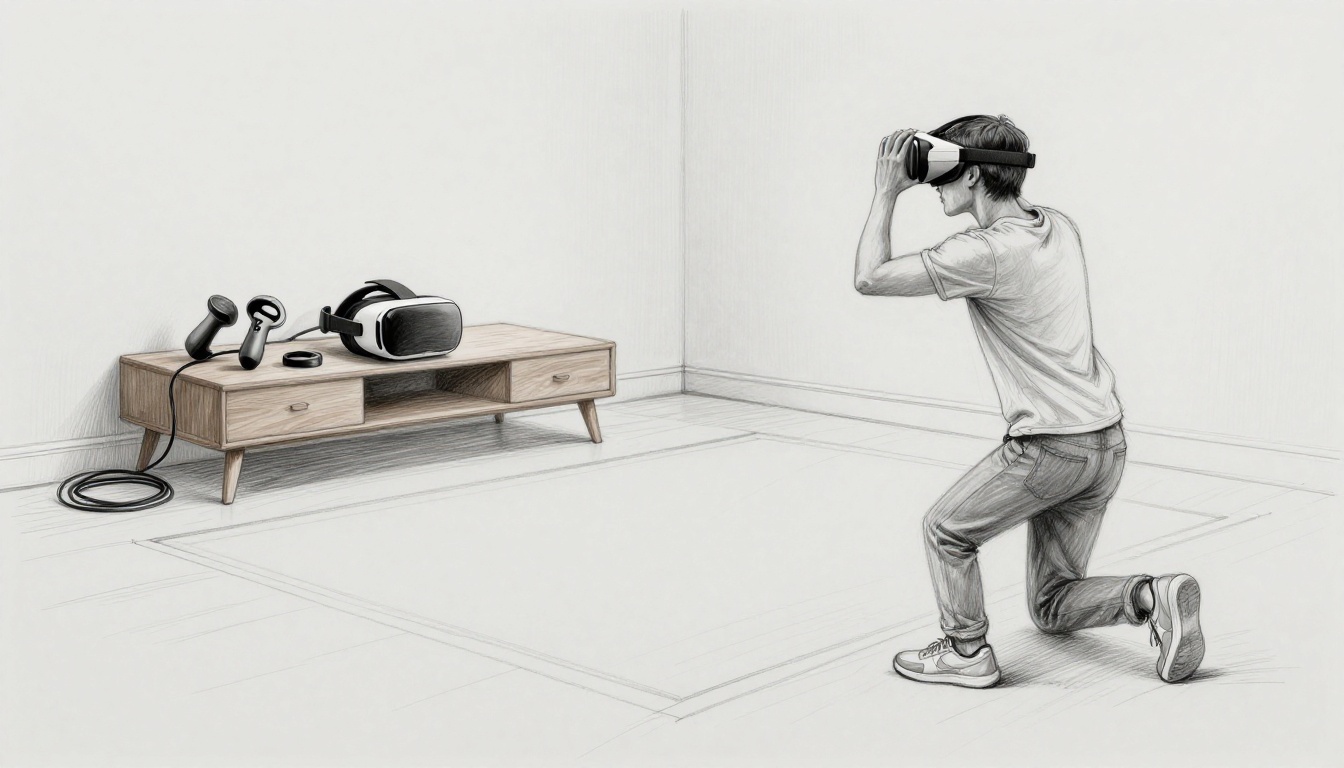
Before you plug anything in, find your play area. A clear open space helps a lot. If you can, aim for about 6 by 6 feet. That buffer reduces accidental bumps and keeps your arms from clipping real furniture.
Also, think about lighting. Bright light can matter for tracking on some headsets, while dark rooms can hurt visibility. If your room has mirrors, cover them. Even modern headsets can get confused by reflections.
Now unbox everything carefully. Most kits include the headset, controllers, a charging cable (or charging dock), and a power adapter. You should also find a lens cloth and quick-start manuals. Keep the box nearby. You might need it to store extra cables.
Next, charge the headset. Many standalone headsets use USB-C charging, so plug it in and wait. A full charge often takes 2 to 4 hours, depending on the model and charger. If you’re on PSVR 2, powering and setup follow PS5 connections instead, so you’ll use the right cables from the start.
While it charges, clean the lenses gently. Use the included cloth, and avoid paper towels. Light smudges can look huge once you’re inside VR.
If you want an official walkthrough for a specific model, start with the help pages. For example, Meta provides a full “get started” guide for Quest 3S in its help center: Getting started with Meta Quest 3s. It matches the steps you’ll see on-screen, which helps when you get stuck.
Finally, keep safety in mind from the first minute. You’re building good habits now. In VR, that pays off later.
Clear Clutter for Safe Play
Clean space beats fancy settings. Remove trip hazards first, then look for obstacles at knee height. That includes low tables, pet toys, and floor cords.
Choose a spot with a flat floor if possible. If your floor is carpeted, press your controllers lightly while standing. That quick test tells you how stable your footing feels.
Avoid mirrors and shiny walls when you can. Reflections can confuse tracking systems. If mirrors are unavoidable, cover them for setup day.
If your headset uses passthrough cameras, you’ll get a safer first calibration too. Passthrough shows your room inside the headset, so you can see where your hands are before you start moving.
When you’re ready, stand in the middle of the space and turn slowly. Make sure you don’t hit anything while rotating your body. You’re checking range, not just comfort.
As a simple guide, think of VR like cooking. If your counter is messy, you’ll spill things. If your space is clear, your first session goes smoothly.
Spot-Check Your Box for All Parts
Before you power on, confirm you have the essentials for your exact headset. Standalone headsets usually include the controllers and a charging method. Tethered headsets include console or PC connections, plus extra cables.
Here’s what to look for by common setup type:
- Standalone headsets (like many Meta models) typically include controllers, a charging cable, and a power adapter.
- PSVR 2 needs the correct cable flow to your PS5. It’s wired, so the “plug in and power up” steps depend on your console setup.
- Premium mixed reality headsets may include special fit tools or a different initial “wear and calibrate” process.
If anything is missing, stop before you waste time. Check the accessory bag, the inserts around the headset, and the small cardboard compartments. Then look at the quick-start paper in the box.
If you’re missing a controller battery pack, a cable, or the correct light seal (for headsets that use one), contact support or get replacements. A missing part can block the whole setup.
For example, if you’re setting up PSVR 2 for the first time, Sony has clear instructions here: How to set up PS VR2 (US). It helps you avoid guesswork with cables and pairing.
Power Up, Link Accounts, and Connect Wi-Fi
Now you’re ready to begin the real VR headset setup. Press and hold the power button, usually for 3 to 5 seconds. If the headset has a battery indicator, check it. If not, just wait for the boot screen.
Next comes accounts. Most headsets require an account to download apps and sync purchases. Some setups also use your age for safety features.
For Meta headsets like Quest 3S or Quest 3, you’ll sign in through a Meta account. Apple Vision Pro uses an Apple ID. PSVR 2 uses a PlayStation Network (PSN) account. Galaxy XR style devices often connect to Samsung or Google accounts, depending on the model.
When you enter details, don’t rush. Use the exact email and password shown in your account settings. If you mistype your email once, you can lose time later.
After your account is ready, connect to Wi-Fi. Do this early because updates and installs often depend on it. Strong Wi-Fi speeds everything up and reduces “stuck download” moments.
Many systems prompt you for a birthdate and sometimes phone verification. Follow the prompts as written. Those steps unlock store access and safety controls.
If the headset offers fast pairing with a phone app, use it. Phone-based setup can speed up the login process. It also helps for firmware prompts.
Meanwhile, updates might download automatically in the background once you connect. So even if you’re ready to play, let it finish.
Create Your VR Profile in Minutes
Your VR profile is more than a name. It can control what apps you see, who you can play with, and how your headset handles safety.
During setup, you’ll typically enter:
- Email and password
- Age verification (sometimes prompted)
- Basic consent for terms and privacy
Try to use an email you check often. If you forget it, you may lock yourself out later. Also, avoid sharing personal details beyond what the setup asks. You don’t need extras for VR play.
If your headset supports multiple users, create profiles separately. That’s useful for families and roommates. It keeps each person’s app library and comfort settings organized.
After your profile is made, review any “safety first” prompts. Many headsets ask about your preferred boundary options. Choose the safer option by default.
If there’s a guided tutorial, follow it. It might feel slow, but it teaches the core hand controls. That reduces frustration when you load your first game.
Wi-Fi Setup for Smooth Downloads
Wi-Fi setup looks simple, but it can make or break your first session. A weak connection often leads to long downloads and repeated login prompts.
Start by selecting your network name from the list. Then enter your Wi-Fi password carefully. If your headset uses an on-screen keyboard, take your time. One wrong letter can send you into a loop.
If downloads crawl, move the router closer. Or sit near a strong signal for setup. Even better, run a quick Wi-Fi test on your phone in the same spot.
Some headsets offer a pairing shortcut through the companion app. If you see that option, it helps. It can also reduce typing.
Once Wi-Fi connects, you should see prompts for updates or store access. Let those finish before you start serious gameplay. You want tracking stability and bug fixes, not mid-game surprises.
Pair Controllers and Nail the Calibration
Controllers feel awkward at first. That’s normal. The goal is to make them feel natural fast.
Begin by pairing. Standalone headsets often pair automatically when you open the controller battery compartment or turn on the controllers. Then you press a pairing button and wait for the headset to detect them.
Tethered headsets like PSVR 2 connect through the console workflow. Setup usually includes controller detection prompts, then pairing steps.
If pairing doesn’t work, check these simple causes:
- Controllers are powered off
- Batteries are low
- The headset can’t see pairing lights
- You’re trying the wrong controller pairing mode
After pairing, move your arms in front of you and test tracking. Your hands should match your real motion with minimal delay.
Now calibration. Calibration sets your comfort and your accuracy. It can affect clarity, motion feel, and boundary behavior.
In most room-scale systems, you’ll stand straight and then “draw” a play boundary. The headset uses cameras to map your space. Follow the on-screen guide and walk slowly.
If your headset includes an IPD adjustment wheel, set it. IPD affects focus sharpness. If text looks blurry, adjust and re-check.
If your headset supports face scan, like Apple Vision Pro, you’ll follow the on-screen fit and scan prompts. That can be key for eye tracking and stable visuals.
Make Controllers Respond Instantly
Pairing success is easy to spot. Your hands show up where they should. Buttons work when you press them.
To confirm everything quickly, try simple gestures:
- Wave your hands at shoulder height
- Point forward and sweep left to right
- Press the menu buttons and confirm response
If you see jitter or drift, fix it now. Start by cleaning controller sensors if your model has them. Then re-seat batteries or check power.
Also make sure you wear the headset correctly. A loose strap can shift tracking. Tighten gently until it stays in place when you move your head.
If your controllers have rechargeable batteries, charge them before longer sessions. Low power can cause tracking dropouts and odd behavior.
The main idea is simple. You want stable input before you try fast games.
Tune Your View for Crystal Clear Sights
Clarity affects comfort more than you think. Blurry visuals can make you move too much. It also adds eye strain.
During setup, follow the fit prompts. Adjust straps so the headset sits steady, not tight. You should feel secure, not squeezed.
Check lens alignment. Some headsets offer lens distance adjustments, while others use a set lens distance with fit tweaks. If your image looks off-center, adjust the headset position on your face.
If the headset has a comfort guide, use it. It usually includes steps for:
- Eye distance adjustments (IPD)
- Headstrap fit
- Optional facial interface adjustments
Also, enable passthrough if your headset supports it. Passthrough helps when you need to move safely. It’s useful for setup day, especially when you’re still learning your boundary.
When your view is clear, your next step gets easier. That step is finding and installing apps.
Grab Updates, Apps, and Safety Tools
Setup continues after pairing. Your headset likely needs software updates. You also want safety tools turned on before you move freely.
Open your settings and look for updates. If you’re on Wi-Fi already, the headset should find update packages quickly. Install updates while you do something calm, like charging controllers.
Then open the app store for your platform. Quest headsets use the Quest Store. Apple Vision Pro uses the visionOS App Store. PSVR 2 uses the PlayStation Store.
For a first session, pick simple, low-movement games. Try rhythm games or stationary experiences first. Beat Saber is a common starter because it helps you learn timing.
Now enable safety features. Most modern headsets include a boundary system. They also include options like pause behavior if tracking pauses or controllers disconnect.
A “break reminder” option may show up too. Turn it on. VR can feel fine at first, then comfort drops later.
Finally, check “environment awareness” tools. Some headsets let you switch between full VR and passthrough view quickly. That can prevent accidents.
Freshen Up with the Latest Software
Updates do more than add new features. They also fix bugs and improve tracking stability.
When you see an update prompt, don’t delay too long. The install time varies by connection speed, but it’s usually worth it. Meanwhile, you can still explore menus inside the headset.
If updates fail, restart the headset once. Then reconnect Wi-Fi and try again. If it still fails, try a stronger signal location.
Also, check for controller firmware updates. Some headsets update controllers automatically. Others do it as part of the app store flow.
Once updates finish, reboot the headset. Then open the safety and boundary settings again. Sometimes a reboot improves boundary detection.
Lock In Safety to Play Without Worry
Safety settings matter most during your first week. You’re learning movement, so your body might go farther than you expect.
Set your guardian or boundary properly. Walk through the calibration steps in your headset menu. Make sure the boundary fits your real room.
Then turn on any “edge” warnings. If your headset supports an audible or visual cue near the boundary, enable it. You can also set up a quick passthrough check for moments when you need to re-orient.
Also look for pause options. Many headsets include a way to pause when controllers drop or when tracking fails. Enable those settings so you don’t keep moving while vision glitches.
Finally, plan rest. Short sessions protect comfort. If you feel warmth in your eyes or a mild headache, stop and take a break. Re-check straps and lens clarity after rest.
For a deeper look at boundary behavior on Meta headsets, this guide explains how Guardian works and how to tune it: Meta Quest Guardian boundary setup.
Customize for Your Headset Model Like Quest 3S or PSVR 2
Now your setup becomes model-specific. Most steps still follow the same pattern. But the details change based on tracking, controllers, and how the headset connects.
Use this section like a quick “what’s different here” map. It helps if you already followed the earlier steps but still hit friction.
A few common differences to watch for:
- Some headsets rely heavily on passthrough during calibration
- Some models require companion apps for account login
- Tethered headsets need correct cable routing first
- Eye tracking and fit scans can change the calibration flow
If you’re switching between headsets, don’t assume every prompt means the same thing.
Meta Quest 3S and 3 Quick Wins
Quest 3S is popular because it’s standalone and beginner-friendly. You’ll often get smooth tracking right away, and mixed reality passthrough helps you avoid guessing.
Here are three quick wins that usually improve your first hour:
- Use the fit tutorial before starting games. A good fit makes controllers feel natural.
- Turn on passthrough preview when you set your boundary. You’ll catch room hazards faster.
- Let downloads complete before you start a big app. Quest stores can queue updates in the background.
If you’re wondering where the official guidance lives, Meta keeps onboarding steps in one place. For model-specific fit and first setup, check: Getting started with Meta Quest 3s.
Also, if you wear glasses, adjust the headset fit and try the lens comfort setting if your model offers one. Don’t force it. A slight misalignment can cause blur or pressure.
Apple Vision Pro and PSVR 2 Special Steps
Apple Vision Pro setup is different because it focuses on fit and spatial features. Plan for a few extra minutes for scanning and comfort tuning. During setup, you’ll need Wi-Fi to complete onboarding and enable key system features. You’ll also perform a fit adjustment and scan flow.
For the official “turn on and set up” guide, use this Apple page: Turn on and set up Apple Vision Pro.
PSVR 2 is different because it’s tied to your PS5. You’ll need the right cable connections, then controller pairing steps in the PS5 flow. If you run into a “not detected” message, double-check cable seating and controller power.
For official PSVR 2 setup, start here: How to set up PS VR2 (US).
In both cases, lens clarity and fit still matter. Clean lenses first, adjust for comfort, and only then jump into more demanding apps.
Conclusion
Your first VR session feels amazing when your setup matches your space. Start with a clear area, charge fully, connect Wi-Fi, and finish calibration before you play.
If you want one habit that makes everything better, it’s short test sessions. Try 10 to 20 minutes, then stop while you still feel great. Adjust the fit, check safety boundaries again, and move on when you’re ready.
Now pick a comfortable starter game and enjoy it. Fire up your headset today, take it step by step, and turn that first “whoa” into a session you can actually repeat.